Wednesday, November 26, 2008
Christmas Advent Calendar
Kristal, don't read this post unless you want to see one of your Christmas gifts :-)
This is a mini-muffin tin disguised as an advent calendar. It is probably one of my favorite projects ever. I love Christmas time because there are so many cute craft ideas. My sister-in-law gave these as gifts last year and I got the idea from her. You simply decorate a card for each day leading up to Christmas and apply magnetic tape to the backside of it. Then fill each cup with a Hershy's Kiss or other treat and cover each cup with the decorated cards. It's exciting to see what treat each new day brings. The best part of it is that it doesn't take up very much room. After Christmas simply pull each card off, store them away and use the muffin tin for its intended purpose the rest of the year :-) If you give it as a gift you can give it with some muffin mix and a card that says "you're gettin' muffin for Christmas." Happy Thanksgiving tomorrow and Merry Christmas after that.
Monday, November 17, 2008
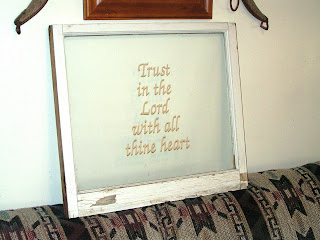
Antique Window with Vinyl Lettering
Supplies:
- Window with wooden frame
- Vinyl Lettering in phrase of your choice
Make sure to wash the window well (and get rid of any spiders like I had to). On the side of the window opposite of where you want your text, mark the window with a dry erase where you want your text to be. This will allow you to line your words up properly. Flip the window over so it's right side up now. Peel the backing from the vinyl lettering and place it over your marks from the opposite side. Rub over each letter with a popsicle stick. Unpeel and erase the dry erase marker. Tada!
Wednesday, November 12, 2008
A new post is in the plans...
So, crafting with a newborn can be kind of tricky. I just wanted to let you know that I haven't completely fallen off the face of the earth and hopefully I can post something fun soon.
Subscribe to:
Posts (Atom)