
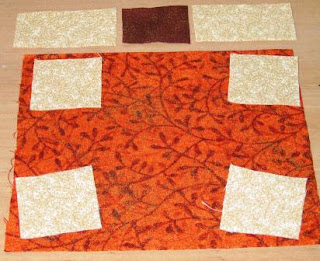

Step 3: With right sides together, line a background rectangle up with the brown rectangle. Sew down the short side where they are lined up. The seam allowance is one quarter of an inch, or the edge of your presser foot. Open it up, match the other rectangle to the brown rectangle and sew again. 
 Step 4: Iron all seams open. So far your two pieces should look like this.
Step 5: With right sides together, line up the raw edges of the pumpkin body and trunk piece. The lengths will only match on two edges, since the pumpkin isn't square. Either of the two edges will work, just make sure the two lengths line up right. 
Step 6: Sew down the length of the edge where the trunk and pumpkin pieces are lined up. Iron it open. Your pumpkin block is now complete.  It should make a 6 inch square. You can now finish it how you want. I machine quilted mine with metalic thread and made a hot pad out of it. Now that you've made one you can experiment with other sizes. You can make short round pumpkins or tall skinny pumpkins. Make pillows, quilts, table runners, what ever you want. Sorry I made this one a weird size, since most quilt blocks end up being 6.5" to account for seam allowance. Oh well, you get the drift of how to make it.


